Improvisational piecing is widely interpreted and, in my mind, there is no right/wrong way of doing it. It's really up to you...and the fabric of course, because sometimes it has a mind of its own! Here are the basics of how I put these coasters together. Just a few ideas to get you going on your own improv projects.
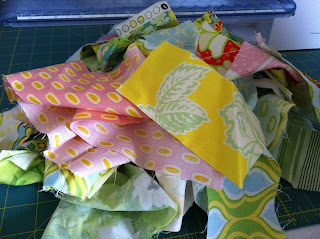
He said her favorite color was yellow so he searched through my scrap bin for anything with yellow on it. Wouldn't you know, almost all of them were Heather Bailey prints. :)
There was no particular size I needed. However, I planned on these being about 4 1/2" finished so I knew I would need small-ish pieces (approx. 2" x 4"). If you are working with a larger size block you may want to have larger strips.
As you can see in this picture, not all my pieces were rectangles. I liked all the yellow in the lower piece but it was cut at a funky angle...who cares!!! Go with it and see where it takes you.
Have a long piece that you are not sure how short to cut? That's fine, just stitch the two pieces together...
and then cut it where you want.
For instance, I cut this one along that dashed line....
and then cut it again at an angle, sloping to the right, after I stitched the blue piece on.
I didn't know at this point how I wanted the finished block to look so I added a couple larger pieces (the bottom and left side) to allow for a little extra wiggle room. And that's okay! Be flexible.
Once I got the top and right sides stitched on I was able to cut it down to the size I wanted. Yes, there was a bit of waste, but you can always use what you cut off as part of another block.
For me, when I have lots of different angles in one block I sometimes have at least one thing about it be balanced (not everyone does, it's a personal preference). So when I cut my block down to it's final size I picked one seam to be "level". As you see it is the bottom piece. It's not real obvious but it is enough.
With this next block, I stitched these three fabrics together.
When it came time to put on the next piece, I decided I didn't want that much red in the block. Instead of cutting off what I didn't want I simply placed the next piece pretty much in the middle and stitched along the right side.
I don't "square up" my edges much when doing improv. I generally add a piece where I want it and cut off the excess. Pretty simple.
This was my attempt at speeding up the quilting. It actually worked quite well. I fell in love with this dense quilting back when I made this. I had to go back and fill in a couple spots on individual coasters, but over all it made this part of the process much quicker then quilting one at a time.
I can't even remember where I bought this mug, probably the thrift store. We purchased it for Father's Day a couple years back and filled it with goodies for him. Although I like the curves and it's large size, my favorite thing about it, without a doubt, is the blue on the inside!!! It's a happy thing. :)
What I will do differently next time...
I will have more contrast in the fabric colors so the angles/design are more obvious. This time it was about my son and what he wanted for his teacher...he's such a sweetheart!


