Keep in mind:
- fabric measurements are based on 44" wide fabric.
- WOF means 'width of fabric' (side to side -or- selvage to selvage)
- use a 1/4" seam allowance
- always stitch right-sides-together
98- 2.5" x 4.5" printed fabrics (slightly generous on both measurements for trimming purposes)
2/3 yard neutral fabric for background -- cut into 15- 1.5" x WOF strips
backing & batting (abt. 40" x 40")
basic sewing/quilting supplies
How you'll make it:
1. Stitch together two of your printed fabrics along the long side. Press and repeat with remaining 96 printed fabrics. Trim blocks to 4.5" x 4.5".
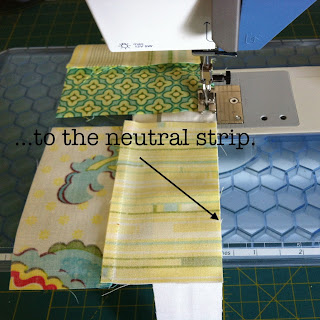
3. Stitch the right side of the first six blocks in each row...
7. Stitch one neutral strip to the right side of the quilt front and one to the left. Press toward the neutral and trim.
8. Stitch one neutral strip to the top of the quilt front and one to the bottom. Press toward the neutral and square up corners.
QUILT TOP COMPLETE!!
I really like how this quilt turned out with these Heather Bailey prints. So bright and cheery. I'm waiting on my solid fabric for the back to show up but I'm anxious to share this tutorial so why wait? I'll be sure to post completed photos once it's all done.


